Veeam Agent for Windows v6 – Direct Object Storage

It has been a while since my last post but I finally found some time to write a new one. This time it will be about Veeam Agent for Windows v6 (which is beta) with backups going directly to Object Storage (yes! agents that will directly backup to S3 without the need for anything else).

When configuring a job you will get the same questions as with previous versions of the agent. So give it a name.

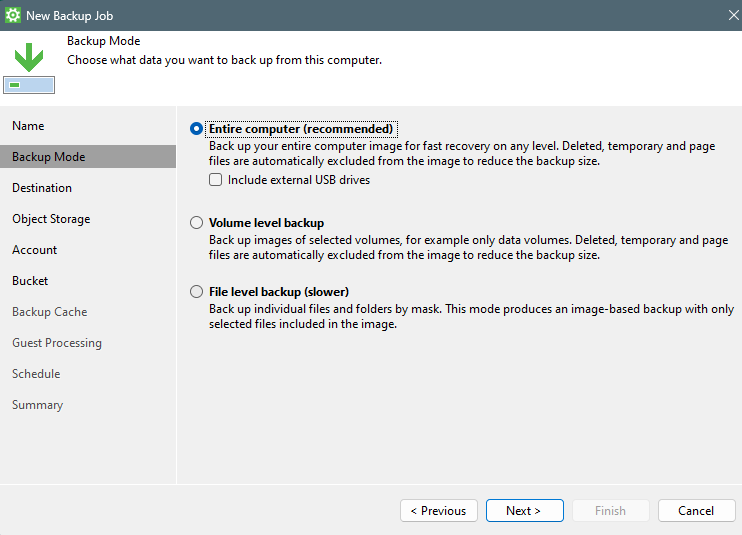
Select what you want to backup, in my case my complete laptop.

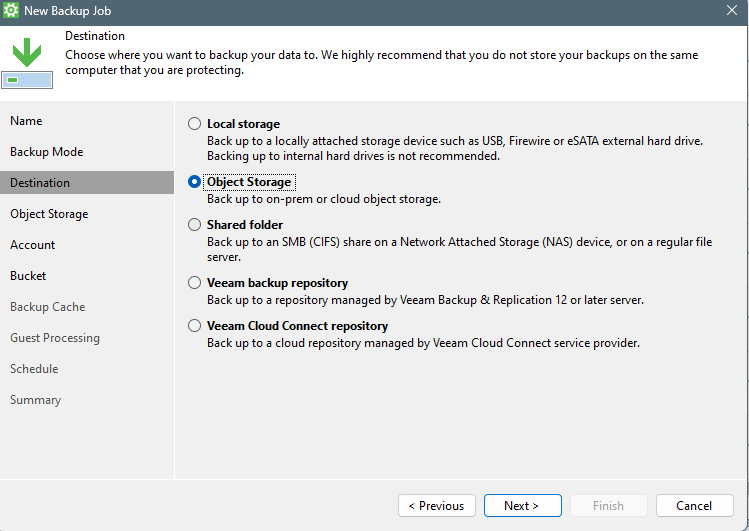
Now for the destination, you can select to use “Object Storage”. This can be either on-premise S3-compatible object storage OR cloud object storage.

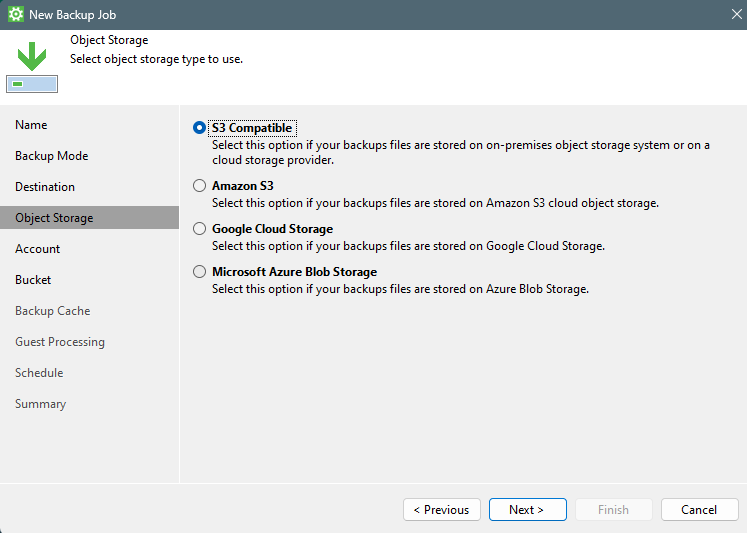
In my case, I select S3 Compatible because I will be using Wasabi.

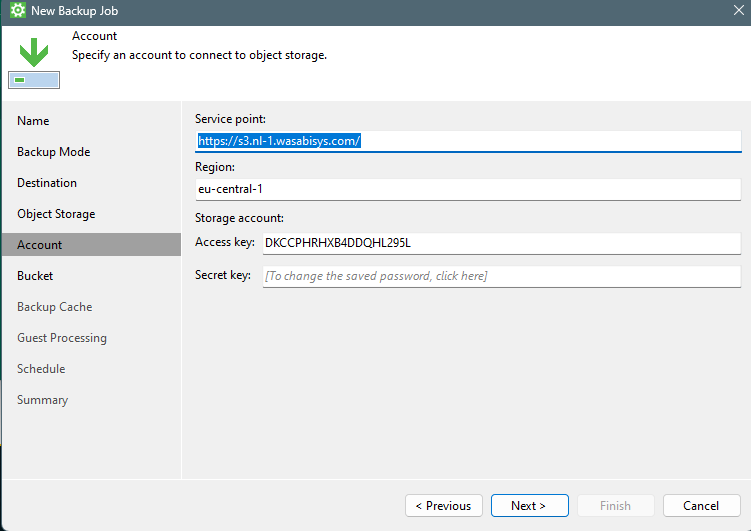
Give in the specifics to connect to the object storage like “service point URL”, “Region” and of course “Access key and Secret key”.

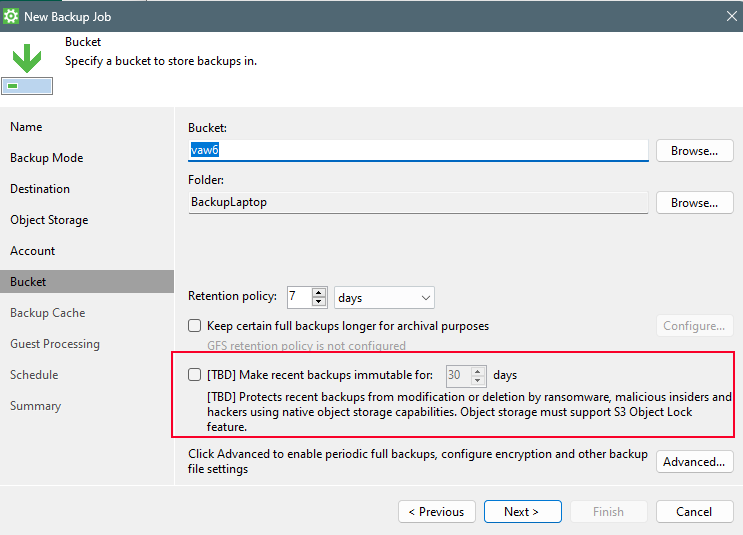
Now….this part is very important! You can even select to use Immutability (S3 Object Lock).

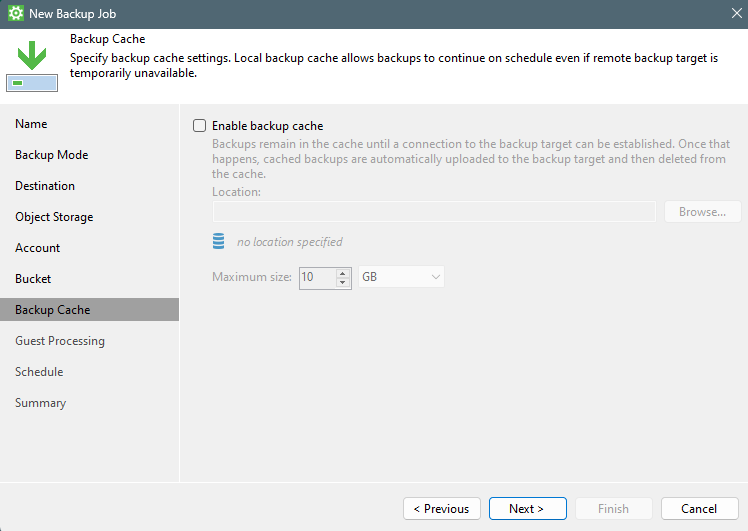
Continue the wizard with the general questions like the “backup cache”.

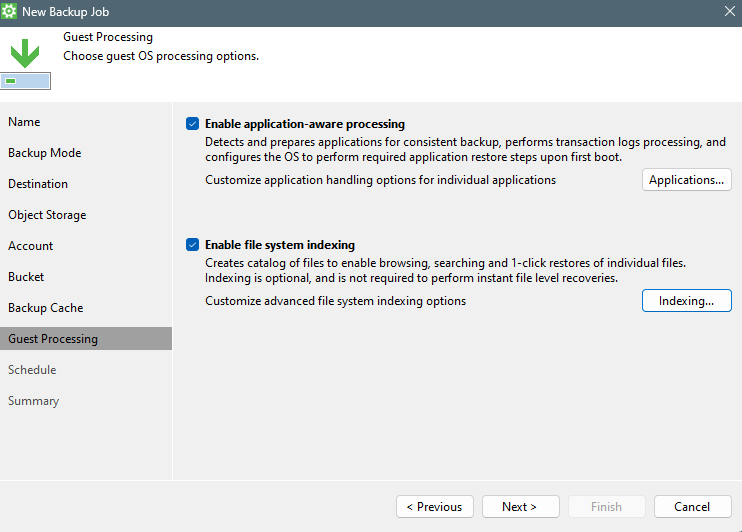
Select if you want to use “Application-aware processing” and/or “File system indexing”.

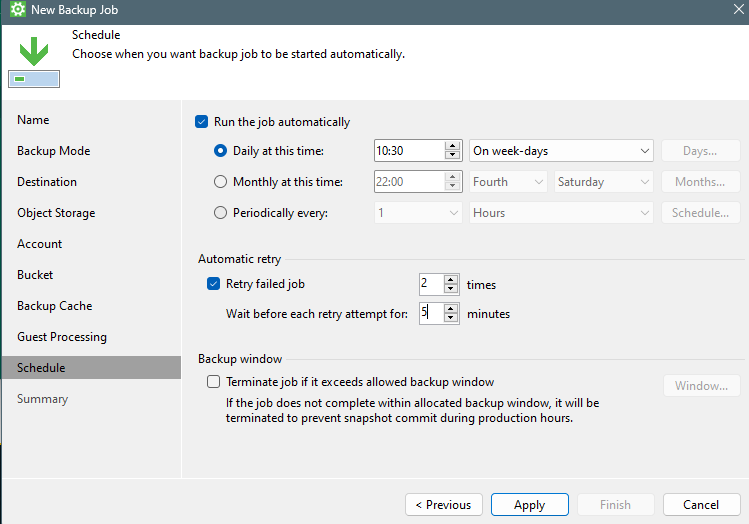
And of course schedule your backups 🙂

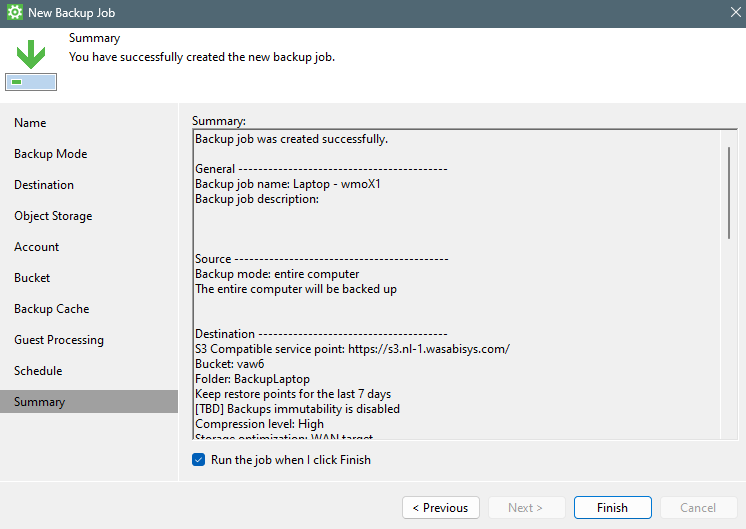
As the final step select to “run the job when I click finish” and click finish.
Now you will see that the backup will go directly to Object Storage!!!

How to set-up gMSA with a secure One-way trust Veeam design in v12

As mentioned earlier in my post about how to set up a one-way trust Veeam design, I ended the post by mentioning gMSA (Group Managed Service Account). In this post, I will show how to use this more secure feature within a one-way trust Veeam design based on v12.

So to recap: I have a one-way trust set up between my veeamdemo.nl production domain and my veeambackup.nl backup domain, as illustrated in this sketch.

Configure for gMSA

To use gMSA, you will have to first add a root key in each forest where you want to utilize it.
This is done by running this PowerShell command:

Add-KdsRootKey -EffectiveImmediately

After running the command you need to add all machines that VBR processes for backup AND the servers used as “Guest Interaction Proxies” (for application-aware processing) to a security group in the production domain. In my example I will be backing up the MSEDGEWIN10 machine AND my Guest Interaction Proxy is called FS01.

Now it is time to actually create the Group Managed Service Account by running the following command on the Domain Controller in the production domain:

New-ADServiceAccount -Name gMSA-VBRv12 -PrincipalsAllowedToRetrieveManagedPassword SG-gMSA-Hosts

In Active Directory you should see the defined account added to the “Managed Service Accounts” group.

Now to test if the gMSA-account is effective on the machines that are in the Security Group you can run the following command on them and it should return a “True” value.

Test-ADServiceAccount gMSA-VBRv12

Now the gMSA needs to be added to the “local administrators” group on the machine you want to backup. In my case the MSEDGEWIN10.

Configure VBR to use gMSA

To leverage the gMSA from VBR we need to add it to the account list by going to “Manage Credentials” and fill in the domainname\gMSA-account

Now finally, in the job where you want to use gMSA you need to select the appropriate “Guest OS Credentials” AND you need to select the correct Guest Interaction Proxy that is living in the production domain.

Now click the “Test Now” button to see if it all works as expected 🙂

After that, you are good to go with using gMSA in your secure Veeam one-way trust design 🙂